What it is
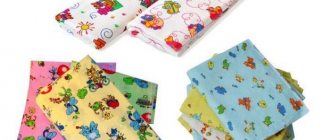
Gauze diapers are an excellent alternative to store-bought diapers. They are good because they allow the baby’s skin to have maximum and complete rest compared to diapers made of synthetic materials. In addition, this is the main classic baby hygiene product made from natural materials. Suitable even for baby's sensitive skin.
DIY diapers
At the same time, it will be very simple to make such waterproof pads, asking yourself the question of how to sew gauze diapers for newborns: just take good quality pharmaceutical gauze and wrap the baby with it using one of the popular techniques.
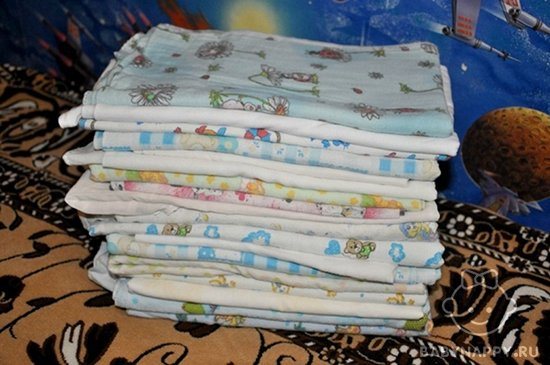
Gauze blotters
We sew ourselves
How to sew gauze diapers with your own hands? It’s not difficult, the main thing is to purchase a sufficient amount of gauze.
To make a diaper from gauze, you need to stitch the edges so that they do not fray.
Then from the gauze blanks it will be necessary to fold the material in three ways:
- headscarf;
- rectangle;
- in Hungarian.
Workpiece dimensions (in centimeters):
- for the Hungarian method: 60x60 (90x90 for a big baby);
- for a rectangle: 60x100.
There will be several sizes for the headscarf:
- for newborn babies – 60x120;
- from a month to do - 80x160;
- after three you can do it - 90x180.
To make blanks, you need to stitch the material along the edges. In the case of a diaper or a piece of a sheet, sew it with a zigzag so that the edges are not thick.
Advantages and disadvantages
Like purchased models, homemade ones have advantages and disadvantages. On the positive side, it can be noted that in this way there is a saving on costs, since one gauze pack is enough to make 25 products. In addition, similar products:
- help the skin not to warm up or become hot;
- are absolutely environmentally friendly and safe for children;
- suitable in volume, since each is made for a baby;
- wears off very quickly.
Note! You can sew reusable diapers with your own hands, but it is worth noting that such products are fixed quite tightly, irritate the skin, and if they are wet, they leak. Therefore, they need constant washing and changing; it is impossible to go out for a long walk.

Constant change as a minus of products
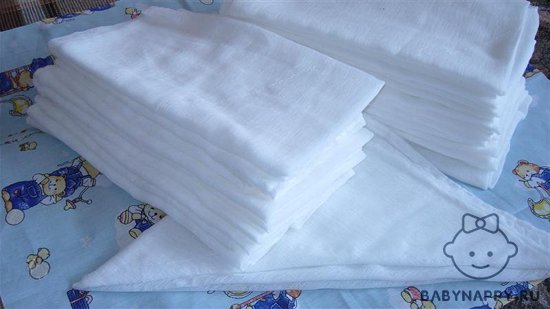
Selection of material and production of blanks
Even old diapers are perfect for homemade diapers.
Before making a diaper, you need to select a suitable fabric and cut it into blanks for future diapers. Both old and new pure cotton diapers are suitable for these purposes. The fabric should be clean and soft. Even new diapers should be washed using washing powder or soap for baby clothes. After washing and drying, the material should be ironed to disinfect and soften the fabric of the future diaper.
There is nothing complicated about the technique of making diapers from diapers.
Homemade diaper blanks are cut into 90x90 cm squares or 180x90 cm rectangles. Then the edges of the cuts must be overcast and stitched so that the fabric does not come apart during subsequent use and washing.
Is it possible to do without diapers?
You can do without homemade diapers by replacing them with store-bought ones. However, according to the results of many surveys of married couples, prolonged wearing of purchased products causes diaper rash with allergies, itching and addiction. Interestingly, many manufacturers are already creating gauze, soft and comfortable patterns. For example, this is the company Octopus, Vitosha and Our Mother. It is worth noting that their products are in demand.
You might be interested in: Features of lubrication of sewing machines from different manufacturers
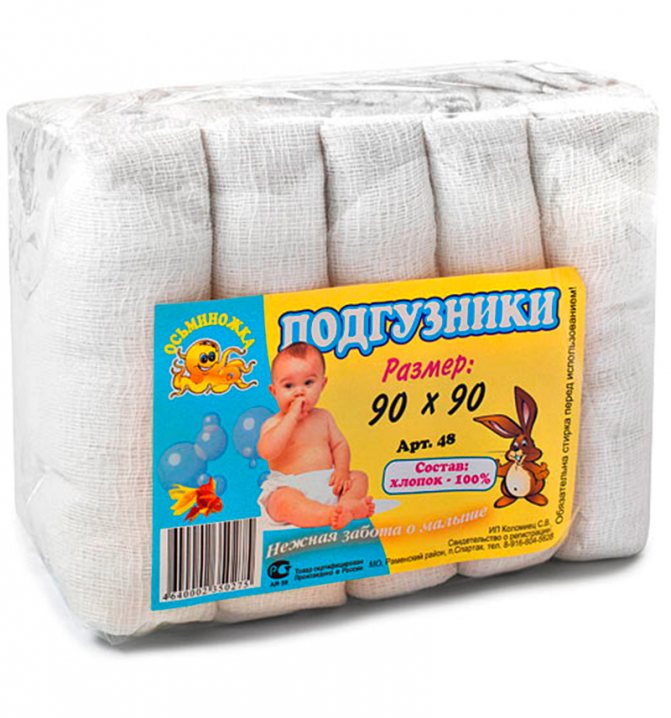
Popularity of Octopus products
Dimensions
Gauze blotters come in different sizes for girls and boys. There are basically three types of products that can be sewn depending on how much the baby weighs and how many months he is:
- For infants up to one month and up to 5 kilograms, products with a diameter of 60 centimeters are suitable
- For children from one to three months up to 7 kilograms, blotters with a diameter of 80 centimeters are sewn;
- For children from three months to 9 kilograms - ordinary products with a diameter of up to 60 centimeters, 180 by 90 according to the headscarf and 90 by 90 according to the Hungarian method.
Note! It is worth noting that the size will depend on the characteristics of the child and the characteristics of his development, physique, and waist.
Baby diapers
How to sew a gauze diaper
Classic gauze diapers are a square or rectangle with a side of 50-100 centimeters, lined with several layers of gauze. To increase absorbency, cotton wool can be placed between layers. To make a diaper, gauze or natural dense and soft fabric is used, which does not need to be sewn, but should be folded in a certain way. Today there are three folding technologies.
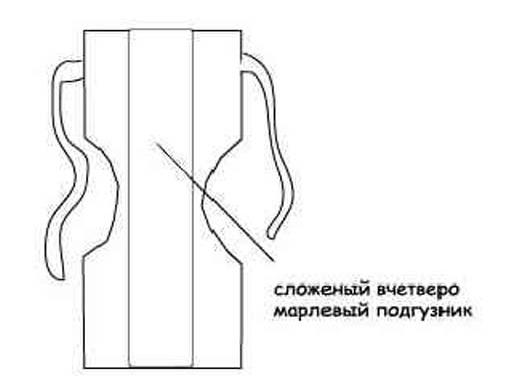
A “rectangle” is made using gauze or fabric with dimensions of 60x100 centimeters. The material is rolled lengthwise several times to obtain a rectangle approximately 20 by 60 centimeters. Turn one edge, put it in the front for the boy, and under the back for the girl. The other edge is passed between the child's legs and tied.
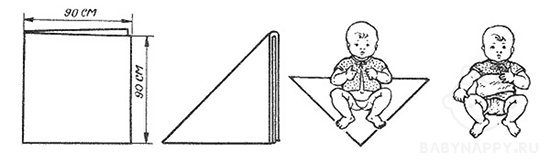
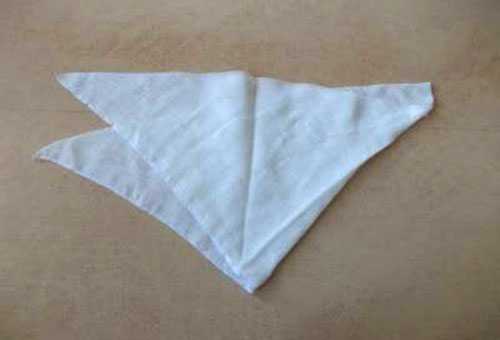
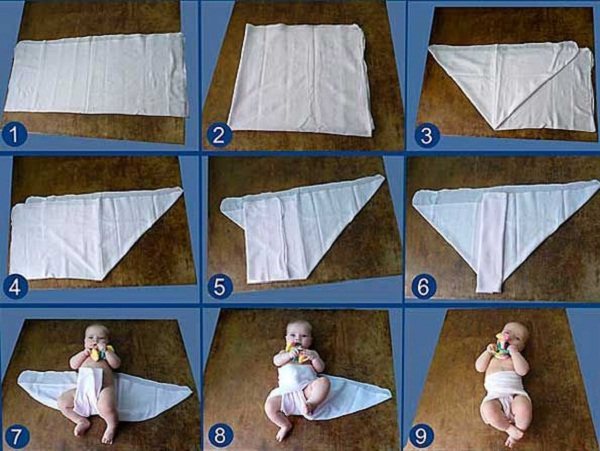
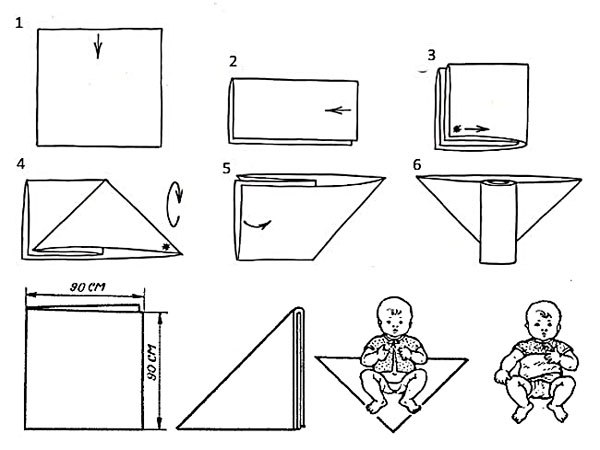
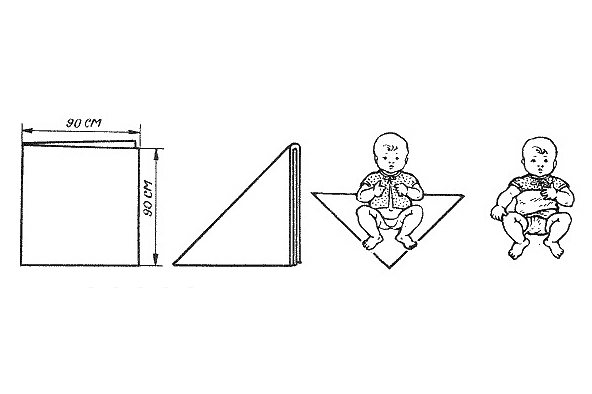
A “scarf” or “triangle” involves the use of fabric or gauze 90x180 centimeters. The material is folded first in half, then diagonally. It turns out to be a triangle scarf, on which the baby is placed and the lower end of the fabric is passed between the legs. The side ends are placed on top of each other and tucked into the resulting belt or tied.
The “Hungarian” method involves using a square piece of gauze or fabric, which is folded in half, first across and then lengthwise. Fold the top corner to form a gusset and turn the material upside down. Fold the free edge several times. The baby is placed in the compacted middle, the lower end of the fabric is threaded between the legs, and the sides are placed on top of each other and secured to the belt.
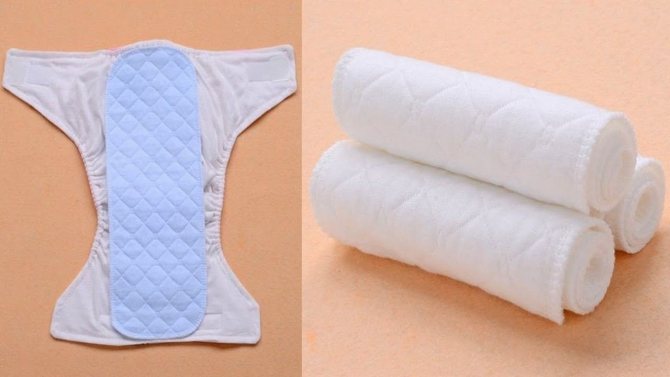
Another option is a multi-layer diaper. This product cannot be used several times, but it will last the baby for several hours, while traditional homemade gauze models have to be changed every 30-60 minutes. To make it, take three pieces of oilcloth and place gauze, folded in half, between the layers. To secure, use ties on the side or front of the stomach. When the baby pees, remove the layer of gauze and oilcloth from above, leaving the rest until the next use.
Types of fabrics
It is worth noting that gauze is not the only material from which blotter cloths are made. As a rule, other fabrics such as chintz and flannel are also used for this purpose. Chintz is a material that does not cause allergies. Refers to natural and breathable materials. Flannel is a cotton fabric that is pleasant to the body. Can absorb moisture well. Suitable for even the most delicate baby skin. The last material, namely madapolam, is a dense gauze composition that does not contain dyes that cause allergies.
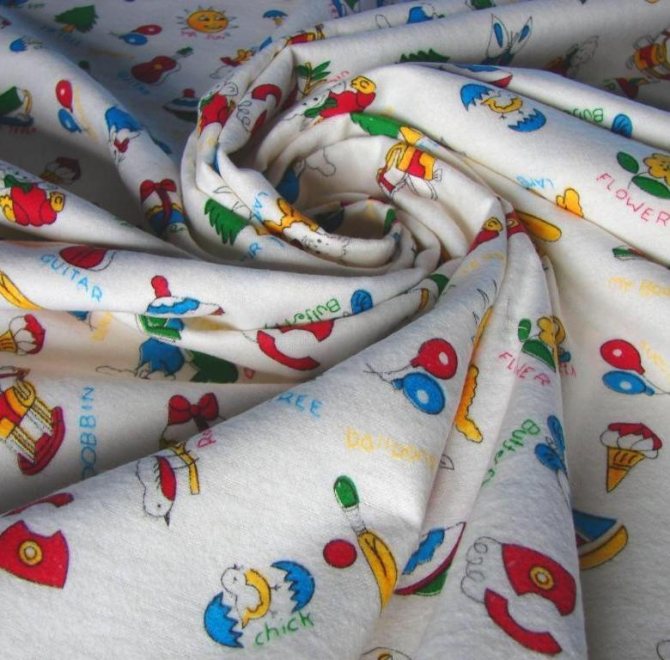
Flannel as a type of suitable fabric
Rectangle
The simplest technique for making a diaper with your own hands is to fold a piece of fabric into a rectangle. Everything is simple here: a fabric with a size of 60×100 or 60×120 is folded several times so as to form a rectangle with a width of 20 cm and a length of 60 cm. At the beginning, the edges of the fabric are folded towards each other so that the seams are inside. When swaddling, the resulting rectangle is placed under the back, passed between the legs and wrapped over the tummy. For girls, a longer section is placed at the back, for boys - at the front.
Useful: How to choose the best first aid kit for your baby
This option is suitable for the little ones who don’t move much yet. Older and more active children, who already roll over or sit up on their own, will simply wrinkle such a diaper - after all, it is not secured in any way. Sometimes mothers ask if it is possible to sew a piece of fabric into a rectangle so as not to fold it every time. This should not be done for two reasons. Firstly, the seams will interfere with the baby, and secondly, such a multi-layer diaper will take a long time to dry after washing. There is no point in either overstitching or sewing disposable gauze, since it is thrown away after the first use.
DIY sewing
To make a disposable diaper, you need to take one of the listed materials and a thread threaded into a needle. Next you need to follow the diagram below:
- Cut the fabric to the appropriate size for the child’s age and parameters;
- Overcast the fabric edges and fold them one to two centimeters on each side so that the fabric does not fray or unravel, and the product becomes reusable;
- Fold the fabric in half to form a square and turn it over with the fold down;
- With your left hand, move the edge from below to the center and turn the workpiece over to the other side, wrapping it in the same way;
- Sew up the curves of the workpiece for more comfortable wearing.
Note! A more detailed lesson can be learned from the video.
Making a diaper for a baby in different ways
After parents have decided on the fabric, they need to decide how to fix the diaper on the baby's body. It is worth remembering that it is not enough to simply wrap the fabric and tie it on the belt. It is necessary to put on the diaper in such a way that the baby can comfortably move his legs and the edges of the fabric do not rub the folds. Therefore, parents should definitely master several diaper wrapping techniques to decide which one is more suitable for their baby. There are three popular methods. Let's look at each of them in more detail. But first you need to decide on the size of fabric that will be needed for each technique.
READ ALSO: Crochet patterns for newborns - free patterns and descriptions for beginners
Table: diaper sizes depending on fabric winding technique
| Child's age | "Klondike" | "Rectangle" | "Hungarian method" |
| From birth to 1 month | 60x120 cm | 60x100 cm | 60x60 cm |
| 1 – 3 months | 80x160 cm | 80x80 cm | |
| 3 months and older | 90x180 cm | 90x90 cm |

If you incorrectly determine the size of the fabric for a diaper, it will not be possible to put it on your baby.
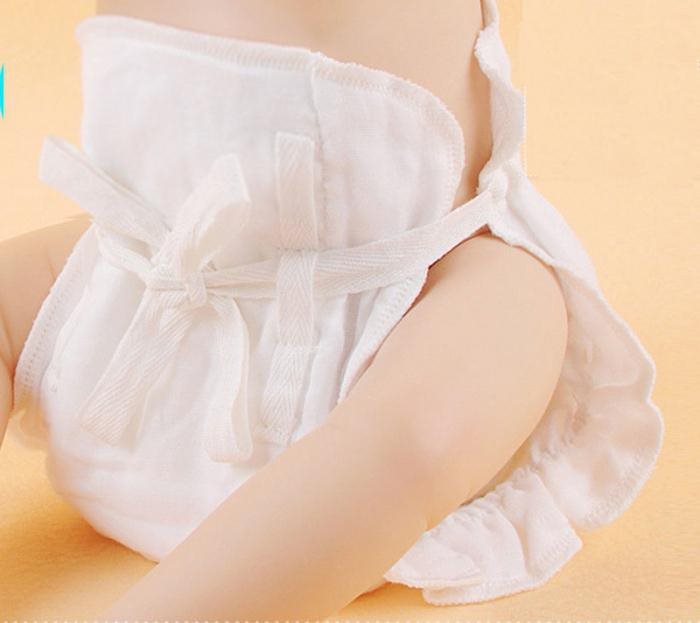
Do-it-yourself reusable cloth diaper for a newborn, triangular in shape, using the Kerchief technique
You don’t need to sew such a diaper, but simply use a piece of fabric of the required size, which after washing is folded again in a certain way. But many mothers, for convenience, prefer to sew a diaper of the desired shape.
- Lay the fabric of the required size on a flat surface.
- Fold the cut in half to make a square.
- Take the upper right corner with your hand and fold it to the lower left corner, or vice versa. The result will be a triangle.
- Baste the sides all over the diaper.
- Sew with one line, leaving 5 cm on one side so that you can turn the diaper inside out.
- Turn the diaper inside out and iron it.
- We sew ties on the sides to make it convenient to fix the product on the baby’s body.
An insert can be inserted into the diaper to increase the absorbency of the product. The insert can be directly sewn into the fabric, or you can make it replaceable. But parents should pay attention: the older and more mobile the baby is, the faster the removable liner will go astray. Therefore, it is recommended to sew it into the product.
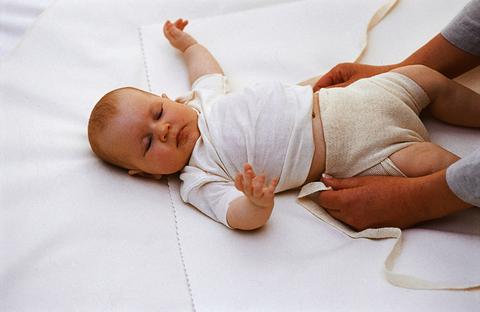
The principle of putting on and fixing a diaper
- Lay out the fabric on the surface so that the bottom edge is at the bottom, and the corners with ties are on the right and left.
- Take the baby and place him on the cloth. Please note that the bottom corner should be between the baby's legs, and the top of the diaper should be at the level of the baby's ribs, above the navel.
- Spread the baby's legs apart, grab the bottom corner of the diaper and lift it up towards the baby's belly.
- The side corners can be thrown over each other and fixed. And if the diaper has ties, it is secured with them on the baby’s belt. The main rule is that the sides should go along the lower corner, which lies on the baby’s stomach, so that after tying the diaper, the lower corner does not fall out.
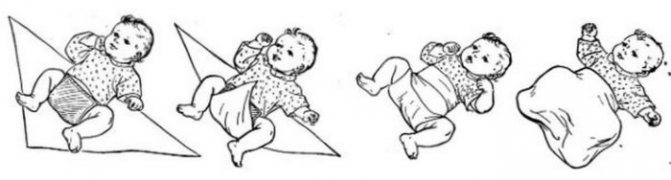
The top corners can be simply tucked in or tied with ties
How to sew a cloth diaper yourself - video
How to make and put on a diaper the “Hungarian” way
If the mother decides to master this technique of putting on a diaper, then you should know that in this case the fabric is not sewn. It is enough to prepare a square of fabric of the required size, depending on the age of the baby.
- Lay the fabric out on a flat surface.
- Fold it in half lengthwise. Please note that the fold should be on top.
- Fold the fabric in half again from right to left. The fold will now be on the top and right side.
- Take the bottom left corner of the fabric, just one layer, and pull it slightly up and to the right. You should end up with a triangle whose vertex coincides with the upper right corner of the square.
- Turn the fabric over so that the fold is down and to the left.
- Take the square piece of the diaper on the left side and fold it into the center of the diaper to create a liner in the middle.
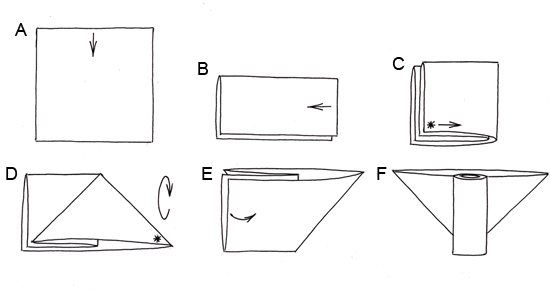
A special feature of this technique is the resulting fabric insert
This technique is very popular, although it is the most difficult. The fact is that after the fabric is folded correctly, an insert is formed on the diaper, which does not bunch up like a removable one and does not require sewing in. After use, the product can be easily washed and ironed. Then you can use it again for its intended purpose.
In terms of the process of putting on, the “Hungarian” technique is similar to the “Scarf” method.
To put this type of diaper on a baby, you need to follow the same steps as in the “Klondike” technique: first put the baby on the fabric, turn the bottom corner to the stomach, fix the edges overlapping each other.
Folding a diaper using the “Hungarian” technique - video
“Rectangle” method: how to fold fabric or diaper correctly
Some mothers prefer not to sew such a diaper so that they can dry it faster after use. However, experts still recommend sewing the fabric for the mother’s convenience, so that she does not have to fold a large piece of fabric each time.
- Lay out the fabric for the future diaper on a flat surface.
- Fold it in half once, then again. You should end up with a 30x50 rectangle with four layers of fabric.
- Baste the edges of the diaper so that the fabric does not bunch up and stitch. Leave 6 cm on one edge and turn the diaper inside out.
- Stitch this edge.
- Iron the fabric along its entire length so that the seams fit and do not interfere with use.
- Sew ties on the top side of the diaper.
The ties will help the mother securely fix the diaper on the baby
Cutouts for the legs will prevent the fabric from rubbing the delicate skin of the baby
These diapers can additionally include replaceable inserts.
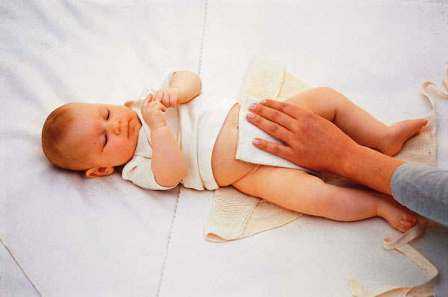
A step-by-step method for putting a rectangular diaper on a baby
- Place the product on a flat surface.
- Take the baby and place it on a surface: changing table or sofa, bed.
- Fold the edge of the diaper, which has no ties, evenly, 3-4 cm inward. If you are swaddling a girl, the edge should be under the baby’s back, if a boy, it should be on the stomach.
- Spread the baby's legs apart and pass the fabric between them.
- Secure the diaper with ties on your baby's waistband.
Without the help of ties, a rectangular diaper is difficult to secure and will fall off
How to sew a rectangular diaper yourself and put it on your baby - video
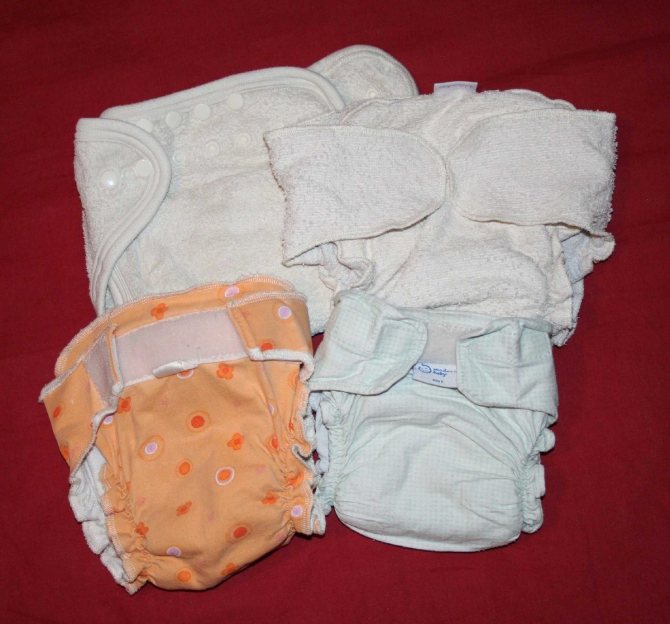
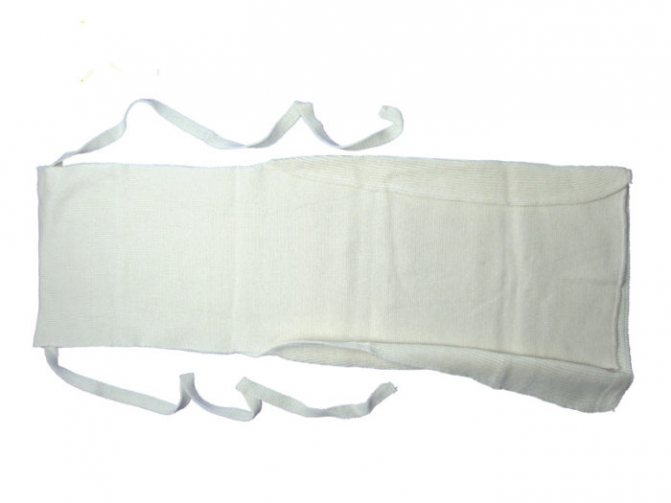
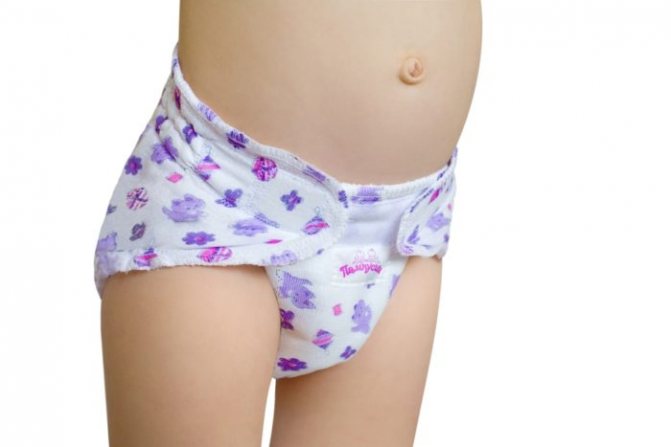
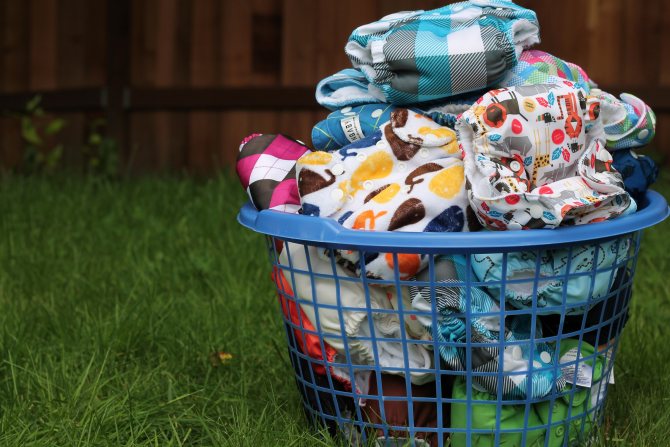
Diapers in the form of panties
Such models are very convenient: they do not need to be folded before each use, they sit securely on the baby and do not get lost, as they follow the shape of the baby’s body. You can sew regular ties or Velcro onto the product to make putting on a diaper faster and more convenient. To sew such a model you will need two types of fabric:
- the outer layer can be sewn from chintz or flannel;
- For internal use, gauze or madapolam is best.
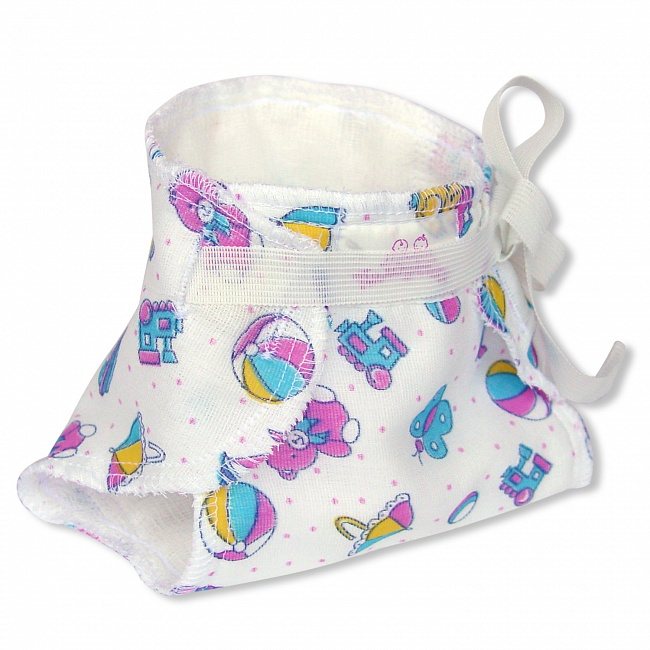
Diapers in the form of panties are light and baby is comfortable in them
What do children's gauze panties look like?
- First you need to decide on the size. You can use a disposable diaper that fits the child. To do this, lay the fabric for the outer layer on a flat surface. Then unfold the diaper and attach it to the fabric.
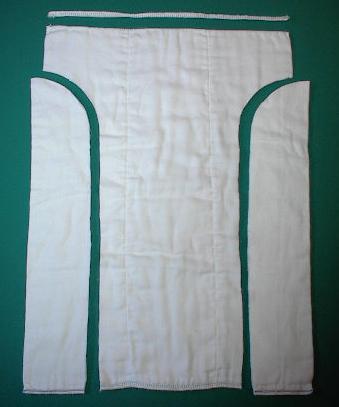
Patterns can be different: the bottom edge can be made not even, but with protrusions on the sides
Gauze panty diapers can be bought at a pharmacy or baby goods store
How to sew diapers in the form of panties yourself - video
Folding techniques
There are three methods on how to roll gauze diapers. They can be made using the Hungarian method, a scarf and a rectangle.
Hungarian method
It consists of turning waterproof rags into panties. The method involves folding the gauze or fabric in half, folding the corner again from left to right to the top corner to make a triangle, and flipping the piece back over to make a triangle.
You might be interested in: Quick sewing of a top without patterns yourself
Hungarian method
Kerchief
According to the scarf technique, you need to fold the cut into a triangle, spread it out and lay the baby on top. Next, you need to lift the bottom corner up and connect the side corners so that they do not come undone.
Rectangle
There are two ways to roll using the rectangle technique. In the first case, you need to make two strips of fabric, put them on top of each other, and then place the child on them so that half of the homemade panties protrudes. Then you just need to bring the bottom part up to your waist and tie it with a ribbon. According to the second method, you need to make a belt for such panties by placing ribbons inside the product.
Rectangular method
"Hungarian" way
This method is very similar to the “kerchief” technique, but its difference is better absorption of liquid. For making it you will need a square gauze. To begin work, you need to fold the material in half. The fold should be on top, and the two flared parts should be on the bottom. Fold the resulting rectangle again. Its right side should lead to the left. All open ends of the gauze layers in the square should also be on the left.
The top layer must be taken by the lower left edge and pulled to the side until it stops. Flatten the fabric. The allocated part of the matter should look like a pyramid. Turn the resulting product over. The bottom edge should be left on top when flipping. This leaves us with a free square on the left. When it rises, there should be matter below in the shape of an inverted pyramid. Roll this square piece into a roll, flattening it a little.
Place the finished diaper on a flat surface so that two opposite corners are on top and the bottom edge is on the bottom. We put the baby on the diaper. The lower end must be threaded between the legs and laid on the tummy. Apply edges opposite to each other one by one. Fold the top layer into the bottom one.
Related article: How to weave beads into tatting for beginners with photos and videos
Washing and care
Washing and caring for reusable blotting cloths is very easy. It is enough to regularly wash them by hand without bleaching agents in ordinary laundry soap, and then dry them on a radiator or clothes dryer. Before use, iron items on both sides.
Washing and care
Sewing gauze diapers for newborns step by step is not as difficult as it might seem. Gauze is a natural and breathable material that will allow the baby’s bottom to breathe and not sweat. You can make such reusable or disposable blotter cloths using the technology presented above. They are easy to wash and care for. It is enough to periodically wash with soap with your own hands.
Advantages and disadvantages of gauze diapers
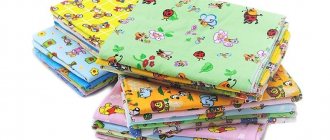
Gauze is a very cheap and accessible material
The following advantages can be cited in favor of choosing gauze as a material for homemade diapers:
- Economical. One standard package of gauze is enough for 20 homemade diapers.
- Environmental safety, absence of harmful substances and allergens in its composition.
- Easy fabric processing, allowing you to create diapers of the required shape and size
- Softness of the fabric.
- Air permeability, which helps to ventilate the skin and prevents diaper rash.
- All feces are quickly absorbed into the fabric, keeping the baby's body clean.
- Gauze diapers, unlike standard diapers, are not addictive and allow you to quickly potty train your child.
The advantages of baby gauze diapers are obvious, but you must also remember their disadvantages:
- due to the baby’s frequent bowel movements in the first months after birth, disposable gauze diapers must be constantly changed;
- untimely change of a wet gauze diaper leads to various rashes and skin irritations;
- A reusable gauze diaper does not last long; when walking with your child or, for example, going to the pediatrician, you should stock up on spare items.
If you need to travel with your baby, you can use standard reusable diapers. This will cost much less than the constant use of such products.